For starters, I pretty much used this guide as a loose basis:
http://www.bmwtips.com/tipsntricks/wheel-repair/wheel-scuff-repair.htmThis is my first DIY/How to thread that I've ever made anywhere, so if more things are needed, please feel free to let me know.
I picked up a set of GR BBS's for CHEAP from 'infusion' due to the amount of curb rash that was on the wheel from the previous owner of the wheels before he bought them. He was quoted around $150 to repair each wheel, so it would have cost over $300 to repair the two wheels. I figured I would attempt to tackle it since I've done minor wheel rash repair on a wheel before, although no where near as bad as this. Some may say I'm cheap, but I've done 90% of the work on my own car, and with the wheels being so cheap, why spend more money to fix them? I may get it done professionally down the road, but I figured I'd at least try. And I'd have the satisfaction of knowing that I fixed them myself.
I tackled this repair on and off this whole long weekend, so I'd say if I was working straight through, I probably would've taken 2 days from start to finish.
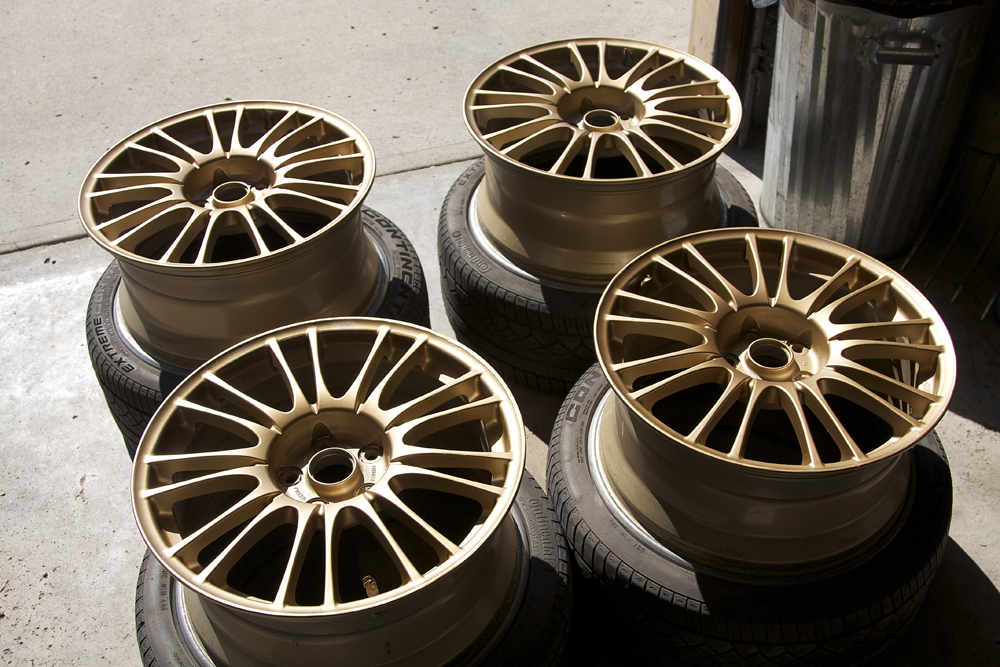
Here are the pics of the wheels before I picked them up:
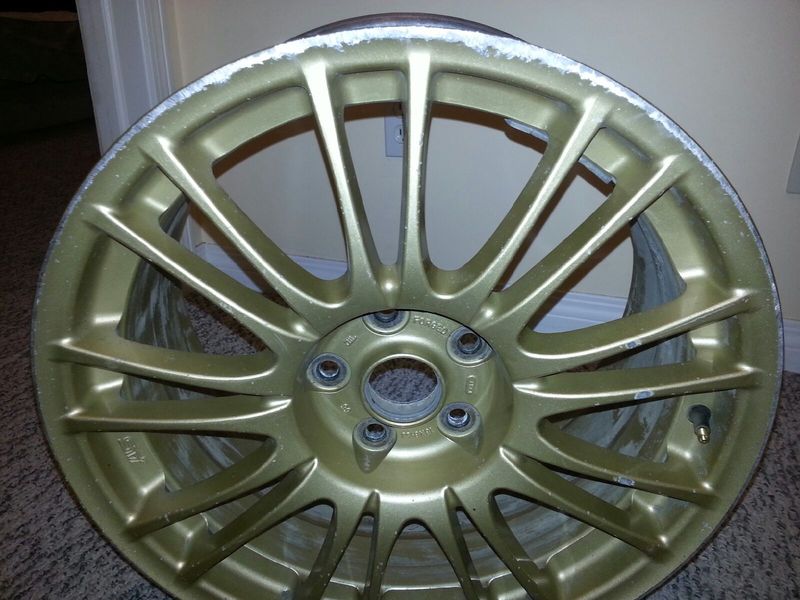

Two of the wheels were bad with curb rash around the whole circumference of the wheels, along with VERY deep gouges on 6 of the spokes on one wheel, and less deeper gouges on 3 of the spokes on another wheel. The two other wheels had paint chips, but those did not concern me.
Here's my list of materials used:
-Bondo (one can with the hardener)
-Various grits of sandpaper
-Degreaser
-Scouring pad
-Heavy duty metal file
-2 cans of self etch primer
-3 cans of Duplicolor Universal Gold Engine Enamel
A few notes on the paint I chose: I originally ordered 2 cans of "Grimmspeed Gold" so I could match the BBS gold color, but them read after I ordered them that the Grimmspeed Gold only matches the BBS gold wheels of the 2004-2007 variety. The 2008+ BBS gold color is more yellow and dull compared to the 04-07 BBS's. So I decided to just use the Duplicolor Universal Gold Engine Enamel because I like the color and its strength, I've had it on the stock wheels that I use for winter since 2009 and it is still holding up with minimal damage.
First job was to clean the wheels with the degreaser and water with a scouring pad to get rid of all gunk and extra built up crap on the wheels.
Next, I took a heavy duty file to the curb rash and flashings of metal to somewhat smooth things out, here are a few pics after the filing:
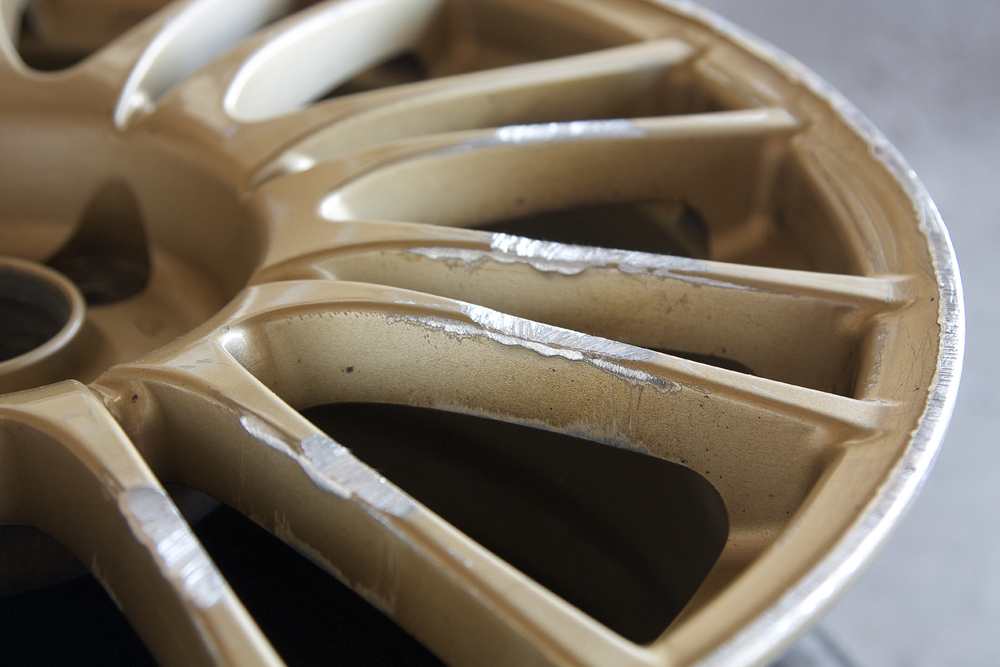
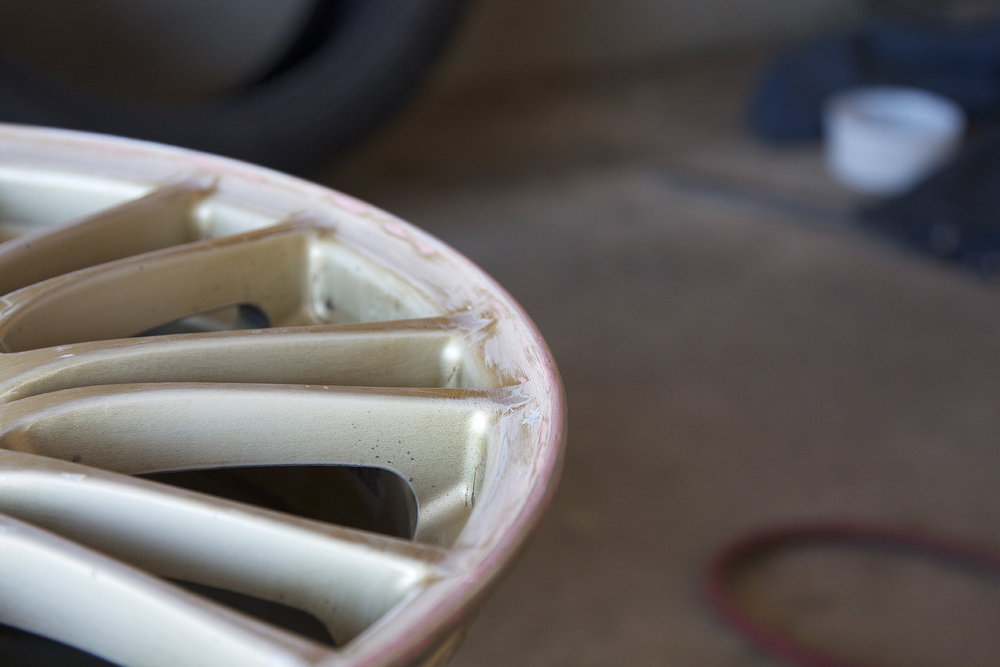
You can see how deep the gouges were and the curb rash all the way around the wheel.
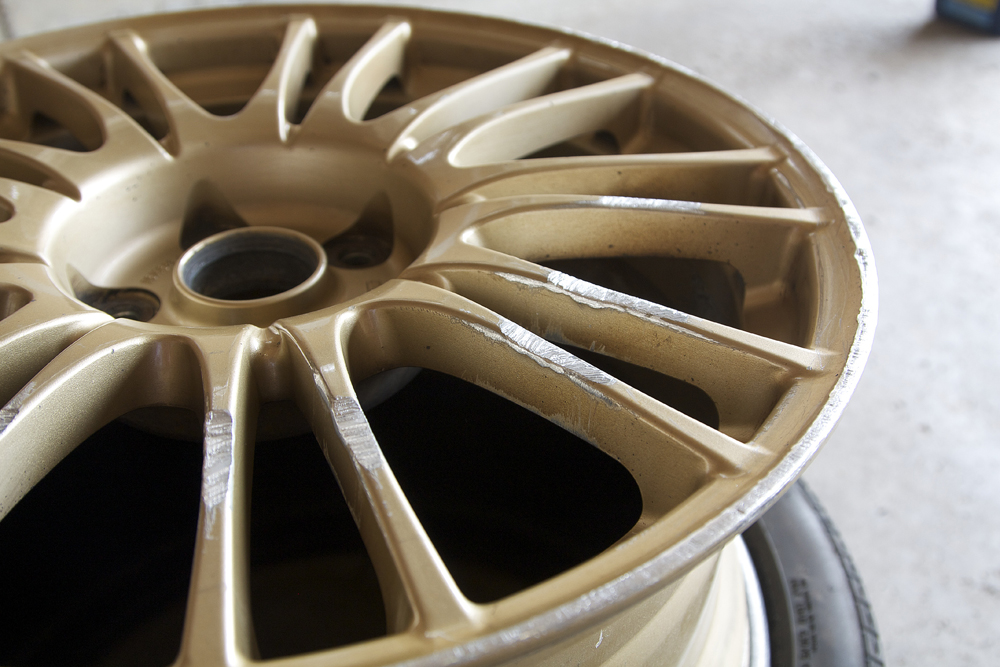
After I was satisfied that I got most of the metal filed down, I used the rough grit sand paper sanded down close to the edges of where the bondo would go, and started layering it on the spoke since thats where I would start, I would do the rim edge afterwards:
Starting with the heavier grit sandpaper, and moving to the lighter grit sandpaper, I started reforming the damaged spokes correctly. Take your time with this, I did about three rounds of sanding and Bondo to get things to where I wanted them. I used my fingers to feel with things were straight, and if I could feel any high or low spots:
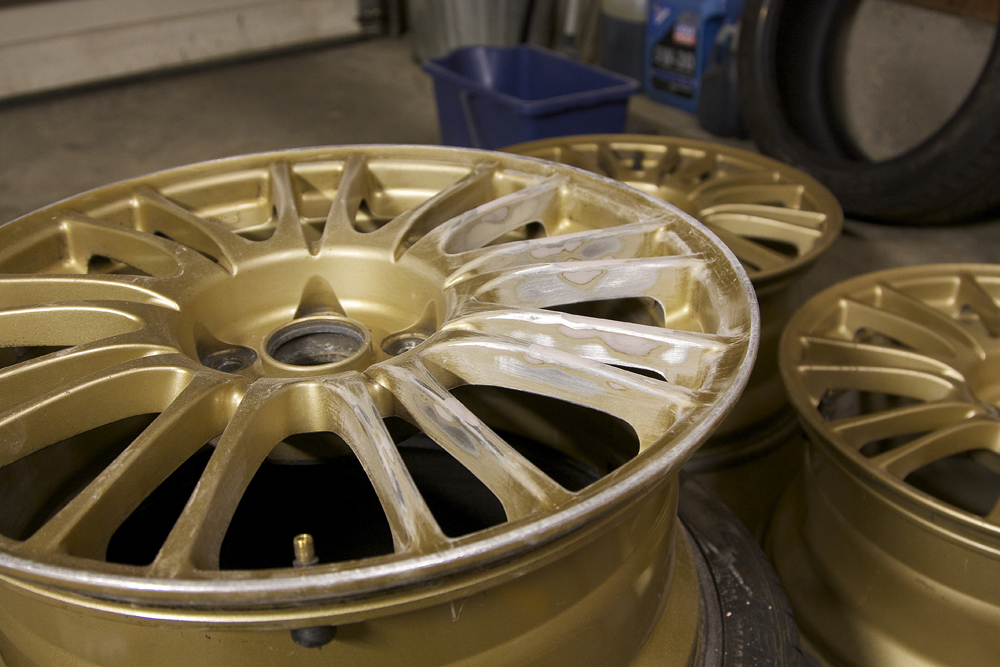
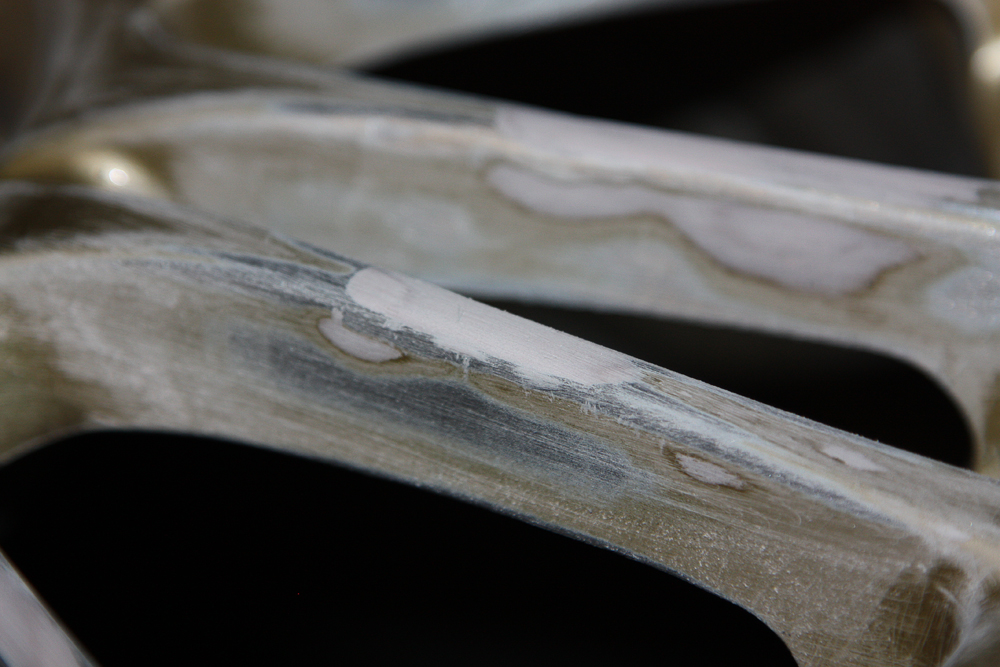
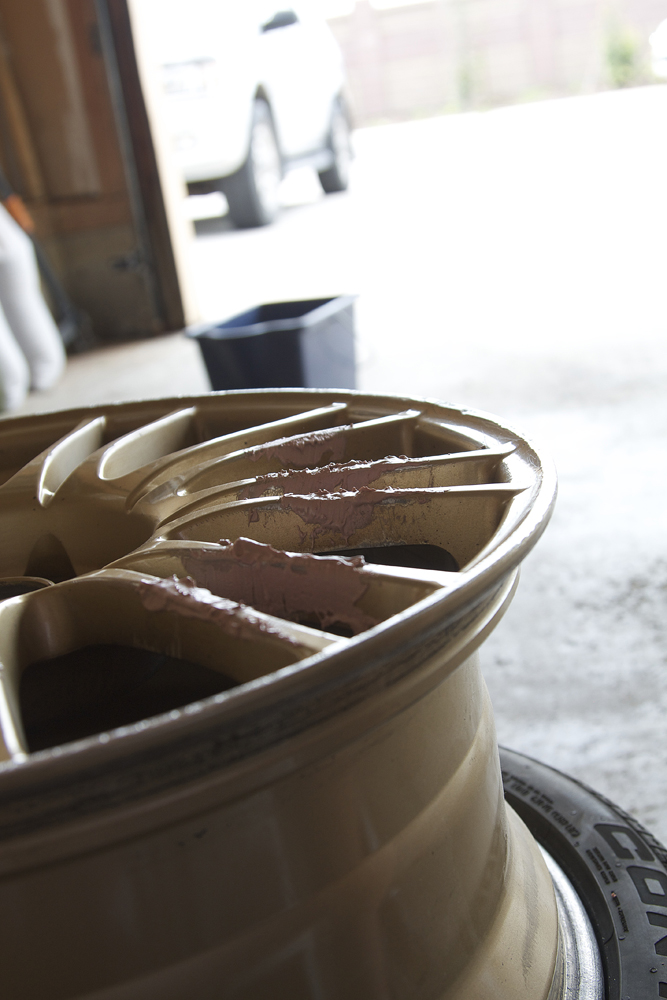
When I was satisfied with the spokes being close to flat and straight, I started with the edge of the wheels. You can see I built up the Bondo quite high, I wanted to make sure I had it even and could sand down to where I wanted it:
Once again, it took a few rounds of bondo and sanding to get it to where I wanted:
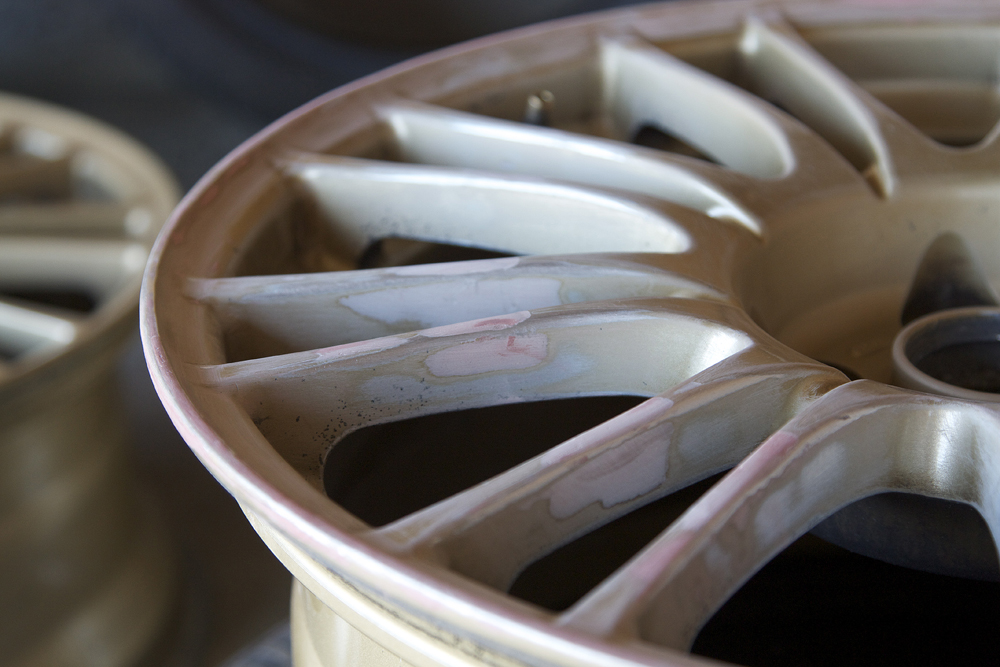
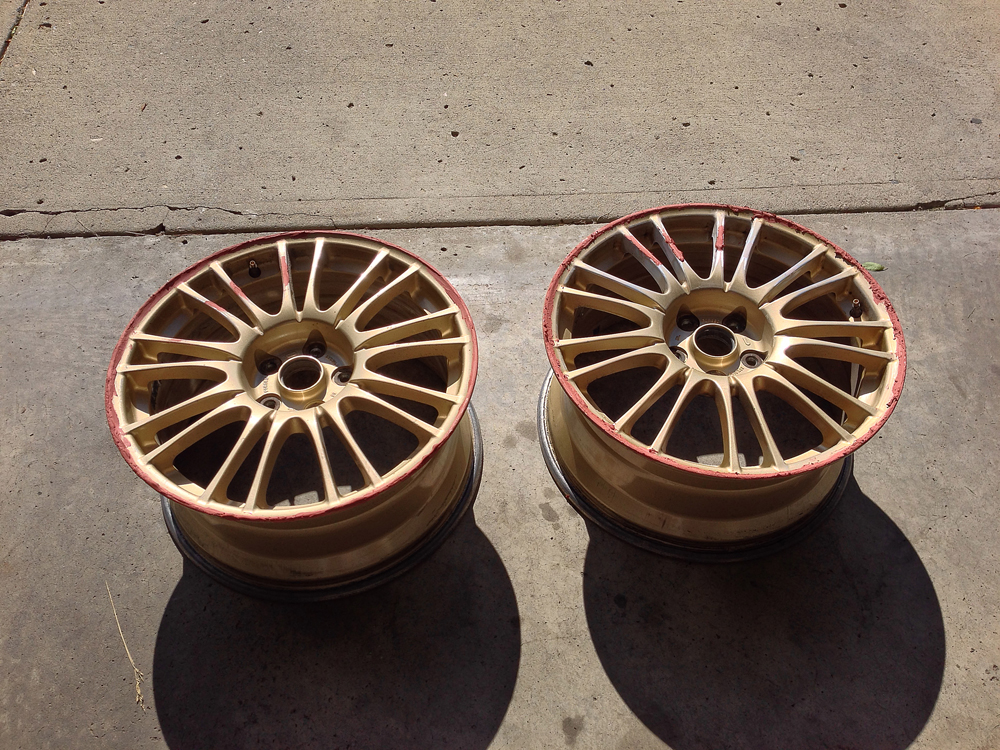
After I was done with the lips and spoke, it was time for primer. I lightly sanded down all the wheels so the primer would stick better, and then I blew all the dust off with an air hose, and used a damp rag to clean up all the surfaces. I followed the directions on the primer as close as I could while spraying light coats and waiting a few minutes in between each coat. Here's the result:
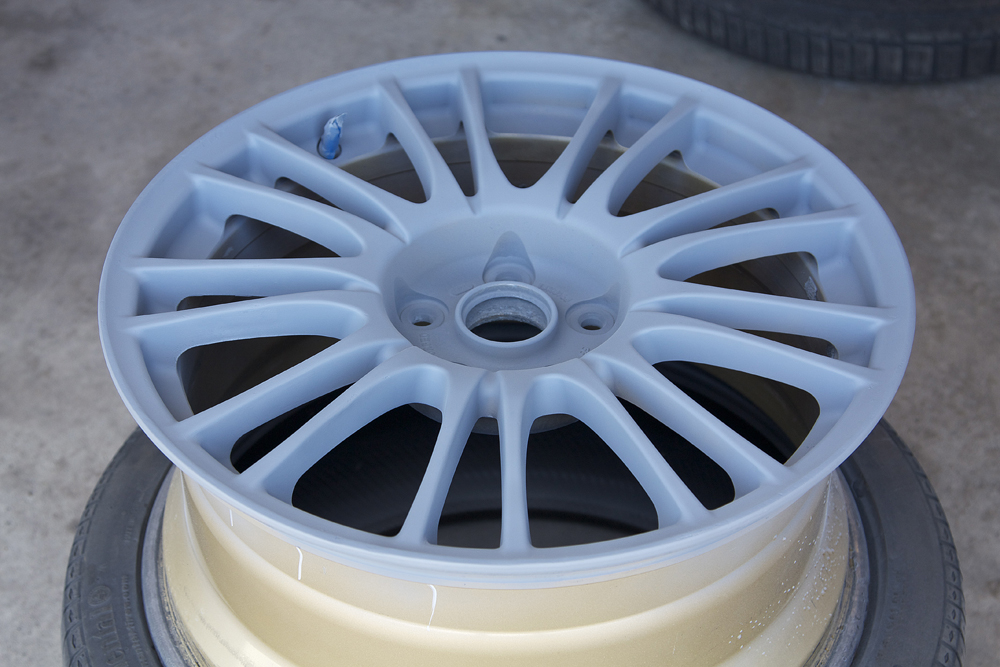
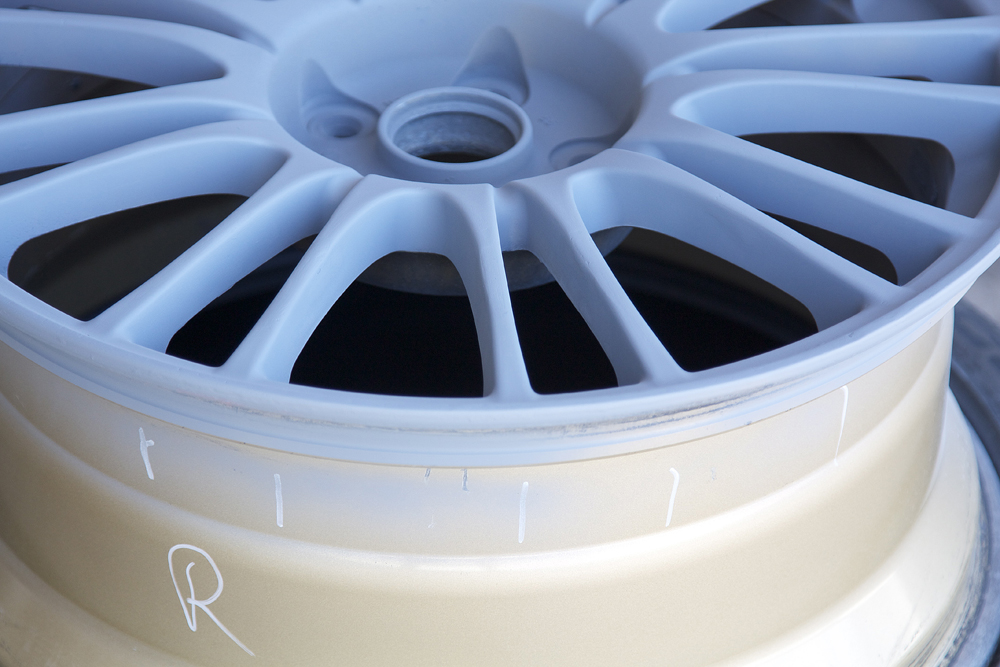
The white lines you see on the barrel of the rim are the spokes that I repaired. Not completely perfect if you look closely, but passes the 10ft test which is what I was going for.

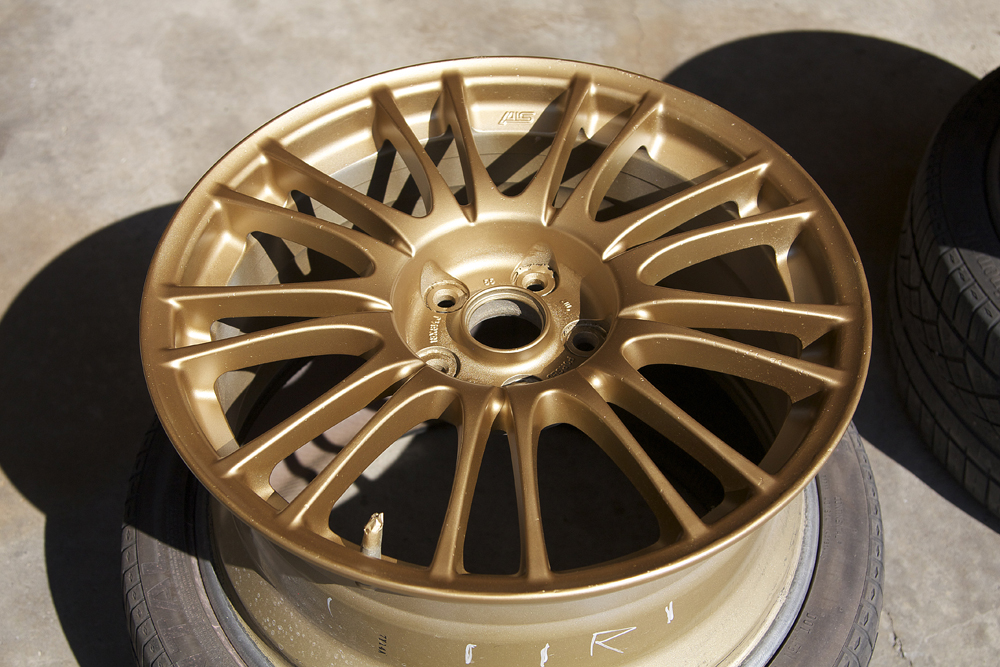
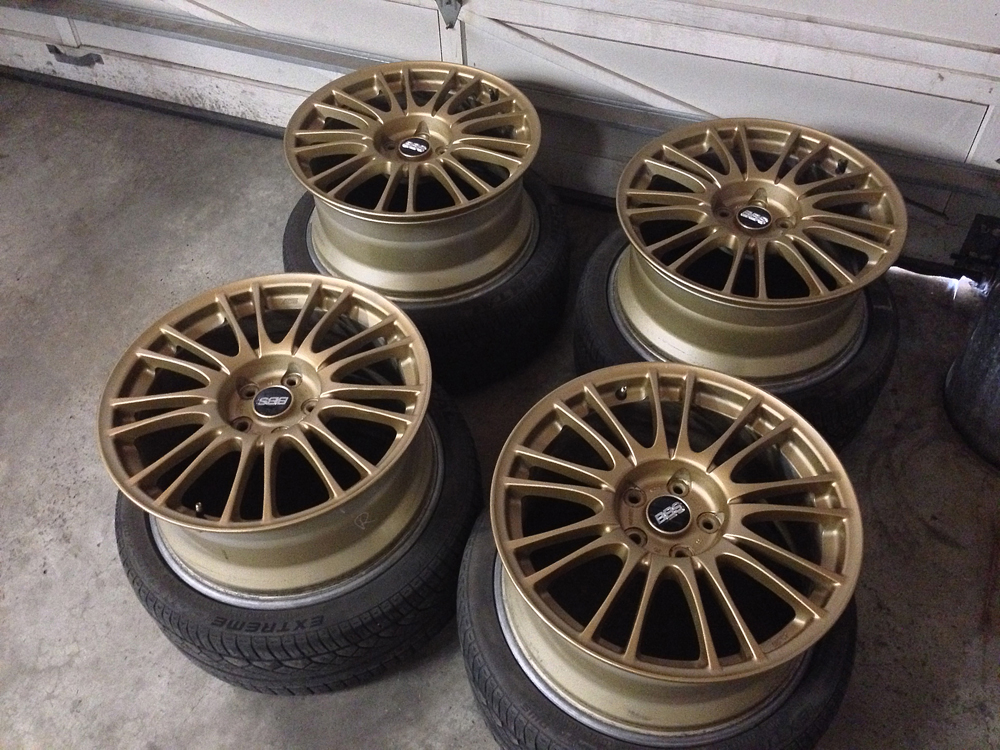
After the primer was dry, I lightly sanded it down again and cleaned all the dust, and began the light coats of paint. Here's is what I ended up with:
Stole my brothers centre caps from his winter BBS's and popped them in, here is how they sit right now in the garage:
So in retrospect, what could I have done differently? I could've worked some more on the spokes with the lighter sandpaper to get them smoother after the primer and hit it with another shot of primer to check. And on the other two wheels with just the little paint chips, I could've given those wheels a full sand down to get rid of all the chips, but that really didn't bother me. The wheels are not in perfect shape, and only if you look closely, you can kinda slightly see a few of the spokes I repaired, as well as a bit of the edges that were fixed. But overall, I am happy with them considering the time I spent and knowing that I did it myself. Like I said before, maybe over the winter, I will get them sandblasted and taken in to get repaired properly when I have more funds sitting around, but for now they will go on the car for the rest of the season, as soon as my conversion spacers get here.


